Table of Contents
Mobile applications greatly rely on forms to enable data entering and communication between users and apps. By allowing them to change and adjust in response to user actions, dynamic forms are powerful tools that can enhance user experience considerably. Building a dynamic form in Flutter is what we would like to discuss in this blog so you can create adaptive and interactive forms for your projects.
What Are Dynamic Forms In Flutter?

Dynamic forms in Flutter are UIs that can change based on user input or other factors. Unlike static forms, which have fixed layouts and fields, dynamic forms can be designed to create interactive custom forms that reconfigure their structure and content.
Dynamic forms are implemented using widgets like TextFormField, DropdownButton, CheckboxListTile etc in Flutter. Widget combinations and manipulations allow for form creation responding to users’ adding/removing of fields, updating options based on the selected values or performing real-time validation of inputs.
Also Read:- What is The Internal Working of RecyclerView?
Applications frequently use dynamic forms whenever forms may differ depending on user preferences, input data or business logic. They offer a flexible, intuitive interface for entering information by users that ultimately results in a more seamless and efficient user experience.
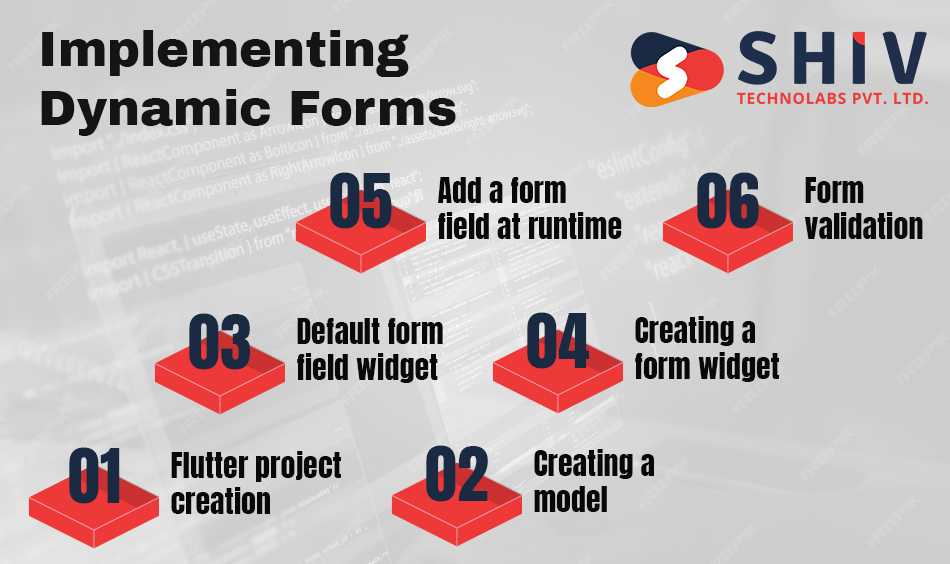
Implementing Dynamic Forms
Here is a list of the things you need before you create and develop this application:
Apparatus: Visual Studio Code
OSs supported: Android, iOS
Minimum requirement: Android (4.4 and above), iOS (11 and above)
Step 1 − Flutter project creation
To create a new Flutter project in Visual Studio Code follow the steps below:
Open the command palette (Ctrl+Shift+P). For mac users it’s Cmd+Shift+P.
Choose the ‘Flutter: New Project’ command then press Enter key.
Select Application and hit Enter button.
Choose where to place your project.
Type in the name that you would like your project to bear.
You will find instructions on how to create flutter apps in Visual Studio Code from Flutter documentation.
Step 2 − Creating a model
Create a DynamicModel that has the control name, form type, value, list of items and validators. This will be your model for adding form fields at runtime.
class DynamicModel {
   String controlName;
   FormType formType;
   String value;
   List<ItemModel> items;
   ItemModel? selectedItem;
   bool isRequired;
   List<DynamicFormValidator> validators;
   DynamicModel(this.controlName, this.formType,
   {this.items = const [],
   this.selectedItem,
   this.isRequired = false,
   this.validators = const []});
}
In order to display the name of a form field, we use the controlName attribute. On its part, FormType happens to be an enum that adds a form field according to the type it possesses.
enumFormType{
  Text,
  Multiline,
  Dropdown,
  AutoComplete,
  RTE,
  DatePicker
}
The IsRequired attribute is used to check if the form is important or not. The basic value of for a form field can be set using Value property.
Validators list is used to set validation for each field. This model has validatorType, errorMessage, and textLength. You are able to add several validations for every field through this.
class DynamicFormValidator {
  validatorType type;
  String errorMessage;
  int textLength;
  DynamicFormValidator(this.type, this.errorMessage, {this.textLength = 0});
}
enum validatorType { Notempty, TextLength, PhoneNumber, Age, Email }
This class is used to bind items in the drop-down and autocomplete lists.
class ItemModel {
  int id;
  int parentId;
  String name;
  ItemModel(this.id, this.name, {this.parentId = 0});
}
Step 3 − Default form field widget
At this point, I would like to create some default form field widgets which include text, drop-down, autocomplete and HTML reader. You can use these widgets at runtime based on the user’s input. The getTextWidget method is used to generate a text-field widget at runtime.
TextFormField getTextWidget(index) {
  return TextFormField(
   decoration: InputDecoration(
   helperText: dynamicFormsList[index].hintText,
     labelText: formsList[index].controlName,
     border: const OutlineInputBorder(
       borderRadius: BorderRadius.all(Radius.circular(14.0)))),
   keyboardType: TextInputType.text,
   maxLines: null,
   validator: (text) {
    var selectedField = formsList[index];

    //To validate non-empty, it returns an error message if the text is empty.
    if (selectedField.isRequired &&
      selectedField.validators
        .any((element) => element.type == validatorType.TextNotempty) &&
      (text == null || text.isEmpty)) {
     return selectedField.validators
       .firstWhere(
         (element) => element.type == validatorType.TextNotempty)
       .errorMessage;
    }

    //To validate text length, it returns an error message if the text length is greater than the fixed length.
    if (selectedField.validators
      .any((element) => element.type == validatorType.TextLength)) {
     var validator = selectedField.validators.firstWhere(
       (element) => element.type == validatorType.TextLength);
     int? len = text?.length;
     if (len != null && len > validator.textLength) {
      return validator.errorMessage;
     }
    }
    return null;
   },
   onChanged: (text) {
    formsList[index].value = text;
   },
  );
 }
The getDropDown method is used to return a drop-down field widget.
DropdownButtonFormField getDropDown(index, List<ItemModel> listItems) {
return DropdownButtonFormField<ItemModel>(
value: formsList[index].selectedItem,
items: listItems.map<DropdownMenuItem<ItemModel>>((ItemModel value) {
return DropdownMenuItem<ItemModel>(
value: value,
child: Text(value.name),
);
}).toList(),
onChanged: (value) {
setState(() {
formsList[index].selectedItem = value;
if (formsList[index].controlName == "Country") {
//Get states based on the selected country by parent ID.
var filteredstates = states
.where((element) => value?.id == element.parentId)
.toList();
if (formsList.any((element) => element.controlName == "State")) {
formsList[index + 1].selectedItem = null;</div>
var existingitem = formsList
.firstWhere((element) =&gt; element.controlName == "State");
formsList.remove(existingitem);
}
if (filteredstates.isNotEmpty) {
formsList.insert(
index + 1,
DynamicModel("State", FormType.Dropdown,
items: filteredstates));
}
}
});
},
validator: (value) =&gt; value == null ? 'Field required' : null,
decoration: InputDecoration(
labelText: formsList[index].controlName,
border: const OutlineInputBorder(
borderRadius: BorderRadius.all(Radius.circular(14.0)))),
);
}
The getAutoComplete method is used to return an autocomplete widget for the search field widget.
Widget getAutoComplete(index) {
return DropdownSearch&lt;String&gt;.multiSelection(
items: const ["Facebook", "Twitter", "Microsoft"],
popupProps: const PopupPropsMultiSelection.menu(
isFilterOnline: true,
showSelectedItems: true,
showSearchBox: true,
favoriteItemProps: FavoriteItemProps(
showFavoriteItems: true,
),
),
onChanged: print,
selectedItems: const ["Facebook"],
);
}
The getHtmlReadOnly method is used to read HTML text.
Widget getHtmlReadOnly(index) {
  return Html(
    data: formsList[index].value,
    shrinkWrap: true,
    style: {
      // tables will have the below background color
     "table": Style( backgroundColor: const Color.fromARGB(0x50, 0xee, 0xee, 0xee),),
      // some other granular customizations are also possible
     "tr": Style(border: const Border(bottom: BorderSide(color: Colors.grey)),),
     "th": Style(padding: const EdgeInsets.all(6),backgroundColor: Colors.grey,),
     "td": Style(padding: const EdgeInsets.all(6),alignment: Alignment.topLeft,),
    },
  );
}
To select a date using the Syncfusion SfDateRangePicker (Flutter DateRangePicker) control, you can use the getDatepicker method.
Widget getDatePicker(index) {
return TextFormField(
controller: textEditingController,
decoration: InputDecoration(
labelText: dynamicFormsList[index].controlName,
border: const OutlineInputBorder(
borderRadius: BorderRadius.all(Radius.circular(14.0)))),
maxLines: null,
readOnly: true,
onTap: () {
showDialog&lt;Widget&gt;(
context: context,
builder: (BuildContext context) {
return SfDateRangePicker(
controller: dateRangePickerController,
selectionColor: Colors.green,
showActionButtons: true,
backgroundColor: Colors.white,
todayHighlightColor: Colors.transparent,
initialSelectedDate: DateTime(2023, 1, 22),
onSubmit: (Object? value) {
Navigator.pop(context);
setState(() {
dynamicFormsList[index].value = DateFormat("dd/MM/y")
.format(dateRangePickerController.selectedDate!);
textEditingController.text = dynamicFormsList[index].value;
});
},
onCancel: () {
Navigator.pop(context);
},
);
});
},
);
}
Step 4− Creating a form widget
When you create a form, this widget helps you to group all the fields. It is merely designed to serve as your container that assists you in grouping together several forms fields. For the purpose of validating the form fields, the GlobalKey must be provided when creating a form.
All form fields have been placed under dynamicFormsList List property. Below is how we can add them into our list using codes. The control name and form type should be specified on this list.
Step 1 discussed usage of Validators list property.
DynamicModel dynamicModel =
DynamicModel("Name", FormType.Text, isRequired: true);
dynamicModel.validators = [];
dynamicModel.validators.add(DynamicFormValidator(
validatorType.TextNotempty, "Name should not be Empty"));
dynamicModel.validators.add(DynamicFormValidator(
validatorType.TextLength, "Maximum length should be 10",
textLength: 10));
dynamicFormsList.add(dynamicModel);
dynamicModel =
DynamicModel("Phone Number", FormType.Number, isRequired: true);
dynamicModel.validators = [];
dynamicModel.validators.add(DynamicFormValidator(
validatorType.TextNotempty, "Phone number should not be Empty"));
dynamicModel.validators.add(DynamicFormValidator(
validatorType.PhoneNumber, "Phone number should be 10 digits",
textLength: 10));
dynamicFormsList.add(dynamicModel);
dynamicFormsList.add(DynamicModel("Address", FormType.Multiline));
dynamicFormsList.add(DynamicModel("Country", FormType.Dropdown, items: countries));
dynamicFormsList.add(DynamicModel("Contact", FormType.AutoComplete));
DynamicWidget() function includes the ListView and Button widgets. dynamicFormsList property is used to show all form fields in the ListView. For any additional field, it should be done via dynamicFormsList property which will update in the UI using setState() method.
GlobalKey<FormState> globalFormKey = GlobalKey<FormState>();
  late List<DynamicModel> dynamicFormsList = [];
  late List<ItemModel> countries = [];
  late List<ItemModel> states = [];

  Widget _dynamicWidget() {
    return Form(
      key: globalFormKey,
      child: SingleChildScrollView(
        child: Padding(
          padding: const EdgeInsets.all(10),
          child: Column(
            mainAxisAlignment: MainAxisAlignment.start,
            crossAxisAlignment: CrossAxisAlignment.start,
            children: <Widget>[
              Column(
                crossAxisAlignment: CrossAxisAlignment.start,
                mainAxisAlignment: MainAxisAlignment.start,
                children: [
                  dynamicLists(),
                  Align(
                    alignment: Alignment.bottomRight,
                    child: FormHelper.submitButton("Save", () async {
                      if (validateAndSave()) {}
                    }, btnColor: const Color.fromARGB(255, 84, 60, 206)),
                  )
                ],
              ),
            ],
          ),
        ),
      ),
    );
  }

  Widget dynamicLists() {
    return ListView.builder(
      shrinkWrap: true,
      physics: const ScrollPhysics(),
      itemCount: dynamicFormsList.length,
      itemBuilder: (context, index) {
        return GestureDetector(
          child: Column(
            children: <Widget>[
              Row(children: <Widget>[
                Flexible(
                  fit: FlexFit.loose,
                  child: Padding(
                    padding: const EdgeInsets.all(10),
                    child: Row(
                      children: [
                        Flexible(
                          flex: 1,
                          child: getWidgetBasedFormType(index),
                        ),
                      ],
                    ),
                  ),
                ),
              ]),
            ],
          ),
          onTap: () async {
            selectedIndex = index;
            var selectedform = dynamicFormsList[index].formType;
            if (selectedform == FormType.HTMLReader) {
              final result = await Navigator.push(
                context,
                MaterialPageRoute(
                  builder: (context) =>
                      HTMLEditorPage(htmlText: dynamicFormsList[index].value),
                ),
              );
              setState(() {
                dynamicFormsList[index].value =
                    result ?? dynamicFormsList[index].value;
              });
            }
          },
        );
      },
    );
  }
The getWidgetBasedFormType() method is used to display the form field based on the form type.
Widget getWidgetBasedFormType(index) {
    var form = dynamicFormsList[index];
    FormType type = form.formType;
    switch (type) {
      case FormType.Text:
        return getTextWidget(index);
      case FormType.Number:
        return getNumberTextWidget(index);
      case FormType.Multiline:
        return getMultilineTextWidget(index);
      case FormType.Dropdown:
        return getDropDown(index, form.items);
      case FormType.AutoComplete:
        return getAutoComplete(index);
      case FormType.HTMLReader:
        return getHtmlReadOnly(index);
case FormType.DatePicker:
        return getDatePicker(index);

    }
  }
Step 5− Add a form field at runtime
For instance, you can add one more field at the runtime by using this dynamicFormsList property? By calling the setState() function, the interface may be refreshed. Given coding example below illustrates how to include a form field at run-time.
dynamicFormsList.add(DynamicModel(“Address”, FormType.Multiline));
You can utilize this code from anywhere when adding a form field and create as many form fields as required based on the type of form used.
Step 6− Form validation

Every mandatory form field must have some kind of validation applied to it. You may insert validations into its Validation list attribute as mentioned before. In addition, there should be a validating function that invokes the overall validation of the form, and this can be done for all elements of the form via globalFormKey where validation is checked.
I initiated my globalFormKey while creating my widget for forms. It helps me validate all widgets in my forms; GlobalKey allows access to current state of FormState class.
bool validateAndSave() {
   final form = globalFormKey.currentState;
    if (form!.validate()) {
      form.save();
      return true;
    }
   return false;
}
When we call the form.validate() method, the validator method is called on each field. The validator function will return an error message when the user’s input is not valid; otherwise, it will return a null value.
   validator: (text) {
        var selectedField = dynamicFormsList[index];
        if (selectedField.isRequired &&
            selectedField.validators
                .any((element) => element.type == validatorType.TextNotempty) &&
            (text == null || text.isEmpty)) {
          return selectedField.validators
              .firstWhere(
                  (element) => element.type == validatorType.TextNotempty)
              .errorMessage;
        }
        if (selectedField.validators
            .any((element) => element.type == validatorType.TextLength)) {
          var validator = selectedField.validators.firstWhere(
              (element) => element.type == validatorType.TextLength);
          int? len = text?.length;
          if (len != null && len > validator.textLength) {
            return validator.errorMessage;
          }
        }
        return null;
    }
Build Adaptive and Interactive Forms with Flutter – Shiv Technolabs Expertise
At Shiv Technolabs, we specialize in creating cutting-edge Flutter applications that provide seamless user experiences. With dynamic forms, your application can adapt to user input, offering a smooth and intuitive interface for data entry and interaction. Whether you’re looking to integrate custom form fields, interactive validations, or real-time updates, our team of expert Flutter developers ensures that your application meets the highest standards of usability and functionality.
Take your Flutter development to the next level with our expertise. Whether you need custom forms, dynamic UI elements, or real-time data validation, Shiv Technolabs is your trusted partner for delivering top-notch Flutter solutions.
Conclusion
Dynamic forms in Flutter provide a smart and adaptive way to manage user input, ensuring a smooth and interactive experience. By incorporating flexible field structures, real-time validation, and customized UI elements, applications can be more intuitive and user-friendly.
At Shiv Technolabs, we bring expertise and innovation to your Flutter projects, delivering scalable and high-performance solutions. Whether you need dynamic forms, custom integrations, or full-scale Flutter applications, our team is ready to turn your vision into reality.
📩 Looking to enhance your Flutter app? Get in touch with Shiv Technolabs today and let’s build something remarkable!